pancarte de porte
coucou !
Je vous propose la fabrication d'une pancarte de porte.
Le tuto est en anglais, mais au vu des photos facile à réaliser et les découpes sont à adapter au style de la personne ou de la pièce !
j''espère que ça vous convient  pas facile de trouver non vus


First, we'll start of with the lid to a papier mache box and we'll paint the outside and inside edges...
Once that dries, we'll adhere a piece of glittered cardstock inside. American Crafts makes some wonderful glittered cardstock that comes in a wide array of colors...
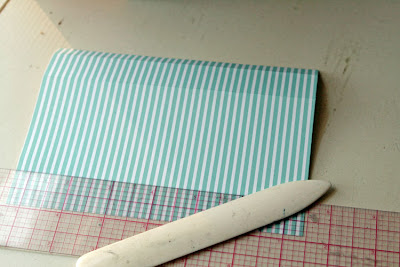
Now we'll start making our candy "shelf." This particular box lide measures 4 3/4" x 6 3/4." So, I cut a piece of patterned paper that measures 5" x 6 3/4." Get out your bone folder and a ruler so that we can begin scoring. Make your first score 1/2" from the edge of the paper...
Your second score will be made 7/8" from the previous score...
Now, repeat the same scores on the opposite end of the paper...
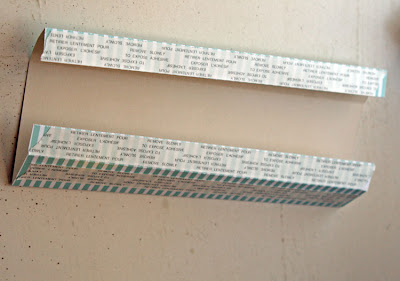
Fold along your scores, and apply adhesive to all but one tab. Leave one of the 7/8" sections without adhesive. This will be the top of your shelf...
Adhere the shelf to the inside of the box...
Next, add a silver pipe cleaner around the inside top edge of the box...
Take your stickers (these are made by American Crafts), and adhere the to a piece of white cardstock. Trim around the stickers, leaving a little tab at the bottom...
Use a bone folder and ruler to score the tabs of your candy jars. The tabs will then be adhered to to top oof the shelf. I used small dots of hot glue for adhesive. Then, add a little piece of trim along the edge of the shelf...
Use more of the American Crafts stickers, some of their mini jewel brads, and pop dots to create your store's sign...
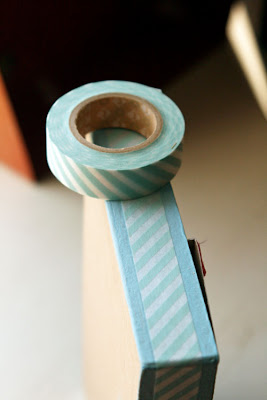
Almost done! Run around the edge of the box with some decorative tape for an added touch...
Finally, make a hanger for your shadow box. I used more of the same scalloped velvet trim and some American Crafts pearl brads to create mine...
And, we're done! I hope that you enjoyed this fun project, and that it inspires you to create your own shadowboxes.
http://www.hollyscharmedlife.blogspot.com/
au travail les filles !! scrap bizzzzzzzzzzzzzzzz


/http%3A%2F%2F4.bp.blogspot.com%2F_T0kDJYjtvZg%2FS6TIxn6jTaI%2FAAAAAAAABdo%2Fo7JFayJAQm0%2Fs400%2Faa1.JPG)
/http%3A%2F%2Fwww.puzzlematic.com%2Fimg%2Fpuzzpiece.gif)
/http%3A%2F%2F1.bp.blogspot.com%2F_0o-F2ZnIAP4%2FTMxARISHyDI%2FAAAAAAAAA7s%2F3TwRWCEkygI%2Fs320%2FP1050360.jpg)
/http%3A%2F%2F4.bp.blogspot.com%2F-sCVvyRhul5k%2FTwMtuOtHM2I%2FAAAAAAAAJwQ%2F6611HtZ9p3E%2Fs400%2FJanuarygo2_edited-1.jpg)
/https%3A%2F%2Fprofilepics.canalblog.com%2Fprofilepics%2F2%2F1%2F211422.jpg)